ProxTalker® App help
Getting Started
Select Create labels to get started making labels for your ProxTalker® SoundTags.
Labels are organized into Books containing one or more Pages. Follow the steps below to create and organize labels. If at any time you want to return to the home screen, touch HOME in the upper left corner. If you want help as you go along, select HELP in the lower right corner.
Books
To open an existing book, touch BOOKS in the upper left corner of the screen and simply touch the book's title.
To create a new book, touch BOOKS in the upper left corner of the screen, then tap the + sign in the upper right corner of the book list. This opens a setup menu for your book settings:
- Type a name for the book.
- Choose a label sheet type to set the layout for printing.
- Select an orientation, either Portrait or Landscape. Note: If large labels are selected, portrait-oriented pages contain landscape-oriented labels, and vice versa.
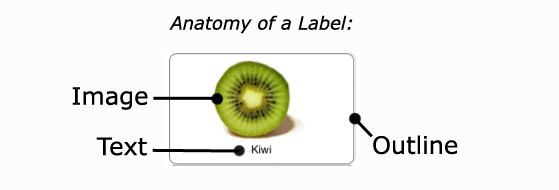
- Select where text will appear on the labels in this book. Note: On labels with no image, the text will always be centred in the label.
- Choose if you'd like to print outlines around your labels. Note: For ProxTalker-supplied sticker sheets we recommend this feature is kept off. To print on full page label sheets, or on plain paper, turn on the PRINT LABEL OUTLINES control. The outline of each label will be printed on the page to show you where to cut out the labels.
- Use the DARKNESS slider to adjust the appearance of the outline.
- Touch SAVE to save your changes.
- You are now ready to create labels. Follow the directions in the Labels section below.
Notes:
- These settings apply to the entire book. You can change your book settings at any time by simply touching the SETTINGS icon in the lower left corner.
- Different books can have different settings.
To delete a book, touch BOOKS in the upper left corner of the screen:
- Select EDIT in the book list.
- Use the red button on the left to permanently delete an item.
- Touch DONE when you are finished.
To change the order of books in the list, touch BOOKS in the upper left corner of the screen:
- Select EDIT at the top of the book list.
- Drag the small icon with three horizontal bars on the right to reorder your book list.
- Touch DONE when you are finished reordering your books.
Pages
A new book starts with one page. You move from one page to another by swiping your finger right or left. The page indicator on the bottom toolbar shows you your relative position in the book.
To add a page, click the ADD PAGE button in the upper right corner. Note: All pages in a book have the same settings automatically.
To delete a page, click the DELETE PAGE button in the upper right corner.
To print a page, touch the PRINT button in the lower right corner. Printing options are directly to an AirPrint-capable printer or by e-mailing a page as a PDF to a computer for printing later (see below).
To email a page as a PDF attachment, touch the SHARE button in the lower right corner.
Labels
Labels are stored in pages within your books. Open an existing book or create a new book to find a page you want to manage.

To create a label, touch an empty cell on the page. This will open the label editor:
- To add text, touch the text field and type using the on-screen keyboard that appears. Remember, the text field can be set to be above or below the image via the book settings menu. Note: On labels with no image, the text will be centred in the label.
- To add an image, touch the camera icon at the bottom to take a new photo, or touch the LIBRARY button in the lower left corner to insert any image from your saved photo library.
- To resize an image, pinch or stretch it with two fingers.
- To move an image, drag it with one finger.
- Touch SAVE when you are finished editing the label.
- Repeat this process for all labels on the page.
- To add more pages, follow the instructions in the Pages section above.
To move a label, drag it with one finger to an empty space.
To edit a label, tap it and then follow the steps above.
To delete a label, hold it down until an "X" appears on the tag, then confirm that you really want to delete it.

